Honda CRV oil pan replacement cost, What You Need to Know About the Honda CRV Oil Pan Replacement Cost, If you are wondering about the Honda Crv oil pan replacement cost, you are in the right place. This article will cover a lot of the information you need to know about this repair. You will learn about how to replace the oil pan and also some of the symptoms that you will notice if your honda crv is leaking.
Symptoms of a leaking oil pan
If you notice some streaks of oil underneath your Honda CRV, you might be dealing with a problem with your oil pan. Usually, a leaking pan causes you problems in terms of oil pressure and engine performance. Luckily, there are some steps you can take to ensure your CRV’s health.
First, you need to determine if the leaking oil is from the oil pan itself. To do this, you should take a look at your dipstick. It should be level and not dip very quickly.
You should also check your drain plug to make sure it is in place. Leaking oil can be caused by an oversize or loose drain plug.
Another potential source of leaks is the cylinder head gasket. These are designed to protect the engine’s oil and lubricant from wear and tear. When they wear out, they can become brittle.
A broken or leaky oil pan can cause the motor to overheat. Eventually, the leaking oil will burn, producing a visible amount of smoke.
The next step is to check the level of your oil. This can be done using a dipstick or a plastic plate. Make sure the level is high enough to prevent the vehicle from overheating.
If you see an oil leak, you should get it fixed as soon as possible. Failure to do so could result in costly repairs.
Aftermarket oil pans are a cost-effective way to repair a honda crv
Aftermarket oil pans offer several benefits over the original equipment manufacturers (OEM) versions. They are more affordable, they are easier to install, and they are compatible with most vehicles.
The Honda CR-V is a crossover SUV that is perfect for people who want to experience a mix of power and versatility. While it’s an ideal blend of performance and efficiency, a malfunctioning oil pan can be a serious problem. It can lead to low oil levels, leaks, and engine damage. If you’re concerned about your engine, don’t delay.
You’re likely noticing symptoms of an oil pan that’s failing, such as puddles of oil underneath the car or oil streaks on the ground. However, it’s important to note that some of these problems are the result of other parts that need to be replaced.
The oil pan contains motor oil, which lubricates and cleans the engine. It is designed to last a long time, but wear and tear can take its toll. Changing the oil is a regular maintenance that helps to extend the life of the engine.
Before removing the oil pan, make sure the engine is warmed up. Keeping the vehicle warm helps the oil to flow more easily. This will also help the engine to start when needed.
Repairing a leaking oil pan
If you are having trouble with your Honda CRV, you may want to consider repairing a leaking oil pan. Leaking oil can cause damage to your vehicle, and can result in an oil pressure warning light coming on. You should also check for a low oil level.
Oil leaks can occur in many places, and can be caused by a wide variety of problems. Symptoms include a puddle of dark brown or yellow oil under your vehicle, or a low oil level.
The leak may be coming from the oil filter or the oil pan. A damaged oil pan can leak oil into the engine, oxygen sensors, or spark plugs. It can also cause the engine to run poorly, or can cause coolant to mix with oil.
When replacing an oil pan, you will need to remove the engine and other parts. This can be tricky, and you might need a jack to help support the car.
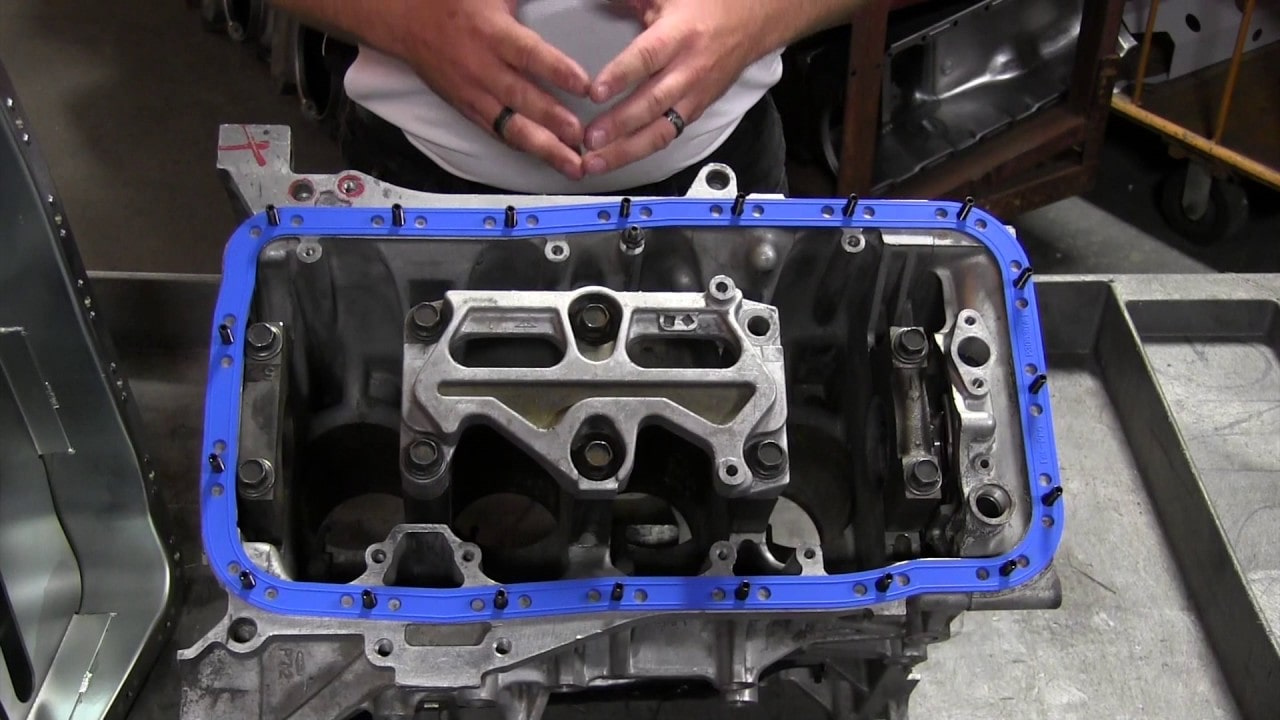
To perform the proper repair, you will need to inspect the oil pan for cracks or other damage. The gasket that seals the pan to the block should be cleaned with solvent and replaced if necessary.
When removing the old gasket, make sure to use a gasket scraper to remove the old material. Doing this will ensure that the new one can be pressed on without causing damage to the mounting surfaces.